Αναζήτηση

Powered By Blogger

Feb 6, 2013

Δεν πωλείται

Δεν πωλείται:
-Μα αν πουλήσουμε όλες τις κρατικές εταιρίες, τι θα παραμείνει κρατικό;

-Το Mega!

(source: http://pitsirikos.net)

    GSM Modem με εισόδους και εξόδους από την Phoenix Contact

    GSM Modem με εισόδους και εξόδους από την Phoenix Contact:
    Αν ψάχνετε για ένα GSM Modem για τον απομακρυσμένο έλεγχο του αυτοματισμού σας μέσω κινητού τηλεφώνου, τότε σας προτείνουμε αυτό της PHOENIX CONTACT. Πρόκειται για ένα GSM Modem με ενσωματωμένους 6 εισόδους και 4 εξόδους όπου μπορείτε να τους προγραμματίσετε από τον υπολογιστή σας μέσω καλωδίου και της θύρας RS-232.

    Διατίθεται σε δυο εκδόσεις, η πρώτη με τάση τροφοδοσίας από 110V έως 240V AC διαθέτει 6 ψηφιακές εισόδους και 4 εξόδους ρελέ και η δεύτερη με τάση τροφοδοσίας 24V DC διαθέτει 6 ψηφιακές ή αναλογικές εισόδους και 4 εξόδους ρελέ.


    Ο απομακρυσμένος έλεγχος του GSM Modem γίνετε από τα κινητά τηλέφωνα που έχετε ορίσει εσείς και μέσω προκαθορισμένων μηνυμάτων SMS. Γράφοντας και στέλνοντας ένα SMS στην συσκευή μπορείτε να ενεργοποιήσετε ή απενεργοποιήσετε τις εξόδους της, ενώ σε κάθε αλλαγή της κατάστασης των εισόδων η συσκευή σας στέλνει ένα SMS στο τηλέφωνο σας. Μπορείτε επίσης στέλνοντας ένα SMS στην συσκευή, να έχετε την πλήρη απομακρυσμένη επιτήρηση όλων των εισόδων και εξόδων της.


    Η συσκευή δεν περιλαμβάνει κάρτα SIM στην συσκευασία της και θα πρέπει επιλέξετε μια εσείς. Δέχεται κάρτες SIM για δίκτυα των 850MHz, 900MHz, 1800MHz και 1900MHz.


    Το λογισμικό προγραμματισμού της συσκευής από τον υπολογιστή σας, διατίθεται δωρεάν και είναι πολύ φιλικό προς την χρήση, χωρίς να απαιτούνται ειδικές γνώσεις προγραμματισμού.


    Για περισσότερες πληροφορίες κατεβάστε το εγχειρίδιο χρήσης της συσκευής κάνοντας κλίκ ΕΔΩ.

    Paperduino Pi

    Paperduino Pi:


    This is a project for people a little bit skilled in soldering and design PCB. The user [dernulleffekt] designed an homemade shield for Raspberry Pi that integrate an Arduino Board.
    The Paper-Duino-Pi is an Arduino shield for the Raspberry Pi. Due to the fact that it is designed as Paper-PCB it is easy to create and one doesn’t need a printed circuit board. Some small modificaten in the OS and IDE and you have a perfect interface for the Raspberry Pi.
    This [video] shows how one can use it with the Firmata and Pure Data. On the [website] there is a very well written tutorial to build your Raspberry/Arduino shield at home.

    Enabling F-bus communications with Arduino

    Enabling F-bus communications with Arduino:
    It’s always nice to see how creative makers approach communication issues in DIY projects, and today we would like to highlight the approach followed by Alex, from InsideGadgets.
    On his website, he provides a detailed tutorial on how to use an old Nokia 6110 (or any derivatives) to send SMS messages by exploiting the Nokia’s F-bus, a simple bi-directional and full-duplex serial protocol.
    After considerable reverse engineering work, made possible by useful online documentation, Alex finally managed to send a SMS from his Arduino board, connected to the phone, thanks to AVR libraries made available by AVRFreaks.
    More information can be found on InsideGadget.
    [Via: Inside Gadgets]

    New design of Arduino GSM and GPS shield

    New design of Arduino GSM and GPS shield:
    Open-electronics have introduced new version of their Arduino GSM shield. The new shield uses well known GSM/GPRS module SIM900 and SIM908 GPS module what makes it versatile for voice and data communications.
    The new module has better power supply solutions and offers more customizations and configurations. All you need is to attach microphone and headphones in order to make phone-calls with Arduino. As usually there are libraries available for running your applications in shortest time possible. Couple Arduino sketch examples will make this happen even faster.

    Many reasons not to use Arduino in your next project

    Many reasons not to use Arduino in your next project:
    Actually the idea of Arduino is great. It’s a gold mine for novices to get simple and middleweight projects to get working in a short time. But all fun ends when critical timing kicks in. Probably this is why there are lots of attempts to mimic Arduino with high performance microcontrollers like PIC32 based ChipKIT or ARM based Netduino. These alternatives may save you in most cases by turbocharging performance but eventually you will end up wasting resources for hidden unknown and then you’ll be forced to dig deeper in to microcontroller hardware.
    Vassilis gives a nice lists that demotivates choosing Arduino for more advanced projects. Instead he suggests focus on pure programming using tools like AVR-GCC with no hidden libraries and functions. He points many reasons like Arduino IDE which is worst IDE for writing and editing code, fixed Arduino clock speeds, mandatory bootloader which occupies program space. Also simple operations like digital write takes to many clock cycles. Some background code is still running even if you’re not using it. As a proof try to compile empty Arduino program and you’ll see that it takes at least 466 bytes for doing nothing. By no means we are not discouraging using Arduino. As in all areas choose smart. And learning microcontroller architecture instead of blind relying on libraries is always a win!

    Wake your computer with Wake On Lan using Arduino

    Wake your computer with Wake On Lan using Arduino:
    Computers have a nice feature allowing powering PC by sending a command to LAN card. Just to make sure if it’s there go to your PC BIOS and find Wake On LAN (WOL) menu which you can enable. Once PC is ready next logical step is sending WOL command to make it work. Lucadentella have used Arduino with Ethernet shield to send this command.
    With proper libraries it’s just few lines of code, because WOL command is simple. You need to send FF:FF:FF:FF:FF:FF  address which is called broadcast MAC, then follows PC’s MAC repeated 16 times. If everything is fine tuned you should see PC powering on. Where this can be used? I see many benefits – as Arduino can accept any sensor information why not hook it to motion sensor and let PC turn on when you come home. I’m sure you can think of much more interesting ways of using it.

    Arduino as AM transmitter

    Arduino as AM transmitter:
    Markus have been experimenting with Arduino and AM signals. He managed to generate AM modulated radio signal by driving timer in PWM mode. Audio signal was taken with Arduino DAC.
    Circuit seems to be really simple – modulator part is only made of three components: decoupling cap, antenna and inductor. Transmitter with current configuration is tuned to 734kHz. How it sounds you can see in following video:
    [via:Dangerous Prototypes]

    Sending Arduino data to Google Docs spreadsheet

    Sending Arduino data to Google Docs spreadsheet:
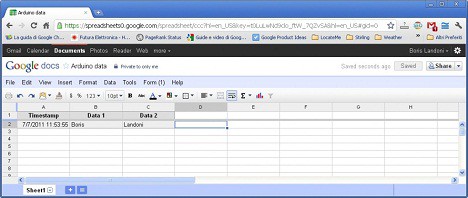
    With Arduino shields and libraries it is really easy to connect device to internet. Probably many of you have already tried Pachube service for publishing data online. The downside of Pachube that it is fairly hard to extract data from it to spreadsheet that could be analyzed in our way.
    Boris have shared his method of sending data from Arduino to Google Docs spreadsheet. The idea to access spreadsheet is to use Form from Google Docs which boxes are associated with spreadsheet fields. Then by using simple POST routine you can collect nicely arranged data table is spreadsheet which can be for your own needs.

    Send strings to LCD from web page

    Send strings to LCD from web page:
    Arduino board and Ethernet shield can serve as basic web server. With limited Arduino resources you can run simple web pages where you can send variable data and also read them back to Arduino. This is convenient when you want to have convenient control panel and remote access.
    So following project actually is a simple demonstration how to enter couple text strings via web page and display them on LCD attached to Arduino. Code can serve as a good starting point for more complex projects.

    Arduino captures network IP and publishes to DynDNS

    Arduino captures network IP and publishes to DynDNS:
    Boris have sent us his new project. It is so called Arduino DDNS. This device captures the IP address of your network and it publish on site DynDNS.com. All without PC.
    It allow a remote access to your LAN even if the IP address of the connections changes. If you don’t want to use the software provided by DynDNS, and then leave the PC switched on continuously, the solution is this project.
    Device queries the site http://checkip.dyndns.com/ to know the IP currently used for the connection, and then publish your free account to www.dyndns.com instead of the computer acquired the new IP.
    Such a device therefore allows to locate a LAN connected to the Internet via a router or modem network.

    Arduino talking to PHP on Ubuntu

    Arduino talking to PHP on Ubuntu:
    The whole trick of this is to make PHP send and receive data via serial interface. By using php_serial.class.php it is possible and pretty easy to do.
    By following this simple guide you’ll be able to control Arduino via web interface by using simple serial connection. Also PHP is able to collect data from Arduino and then display it, graph it or even store in MySQL database. Think of projects that you can make with this ability…

    Making Arduino wireless

    Making Arduino wireless:
    Probably you already have few cheap RF transmitter and receiver modules around. If not you can grab them at Sparkfun for really cheap. So one thing is great they are cheap, but these are only one way 315MHz modules, so signal can be transmitted one way – ideal solution for some kind monitoring like weather stations and so on. These modules are capable to transmit data at up to 2400bps rate to a max of 500 feet distance.
    So here it is a simple set up of two Arduino boards – one with receiver and another with transmitter module. As these modules don’t include any transmitting protocol, it has to be programmed within microcontroller. Transmitting protocol basically consists of two byte starter packet with helps to prevent random noise, then follows address byte that allows addressing multiple transmitters, 2 bytes of data, and last portion is a check sum – to make sure packet isn’t broken. So this is a quick example for your next project if you decide to use these modules.

    Fully featured Arduino Web Server

    Fully featured Arduino Web Server:
    Probably you have tried to do simple HTTP routines with Arduino and Ethernet Shield. But problem is that all has to done manually in Arduino language. It is better to upload html pages in the way as they used to be. So here is a nice tutorial and software where you will be able to run TinyWebServer on Arduino Duemilanove. Along Arduino and Ethernet shield you will also need Adafruit Data Logging shield for storage support. This way all pages and images can be conveniently stored or uploaded via HTTP server to SC card.
    You will need to do small modifications to hardware in order to run things smoothly. With such server you will be able to lift Arduino projects to next level.

    Send Arduino data to Matlab

    Send Arduino data to Matlab:
    Probably you know that Matlab is a great tool for data processing, simulation and other engineering programming. So why not use it in embedded application like Arduino.
    Here you can find simple and fast asynchronous Arduino to Matlab communication sources. It can be handy for fast sensor data displaying in convenient graph and even do some analysis.